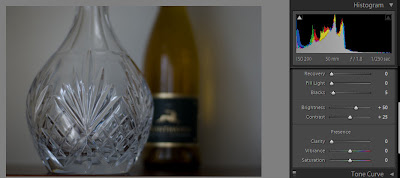
 As you can see in the above (unprocessed) photo, the histogram is not evenly distributed and reflects that the photo is underexposed. For the photo below, I just selected the develop pre-set called Auto-Tone. The photo is clearly brighter and has more color. The sliders have also moved accordingly to new settings. You can further tweak any of them and instantly watch the changes on the photo. It had bumped up the exposure and selected values it thinks are the bes for this photo.
 This next setting is General-Punch, which I like to use very often. It doesn't to much for this photo because it's generally underexposed and too dark to start with. You can see the histogram is still squished to the left and the exposure slider hasn't moved. It did bump the vibrance slider up to 25 though.
 This final one is direct-positive. I'm sure this somehow relates back to the good old darkroom days and some crazy development technique. Here and here are good examples of this setting on a photo that really looks good. Sometimes I'll try it on a photo and it looks bleh. Sometimes it really brings the photo alive. It doesn't really do much for this photo (below) because the exposure needs to be adjusted before applying the pre-set.

I played around with a few pre-sets and decided I liked the Auto-tone best. Perhaps it's because it corrects the underexposure and none of the others seemed to do that before applying the slider settings. I started out with the Auto-Tone develop and the tweaked the sliders a bit more to add a little more pop and bring out some of the light and dark areas.

Lightroom has quite a few pre-sets to develop Raw photos, and you can create your own pre-sets. The other fabulous thing about LR is that you can develop a photo to your liking, then simply cut & paste all the settings (or select only certain settings) to other similar photos. This is fabulous for processing many photos that are similar, but still gives you the control to go back and individually tweak each one.
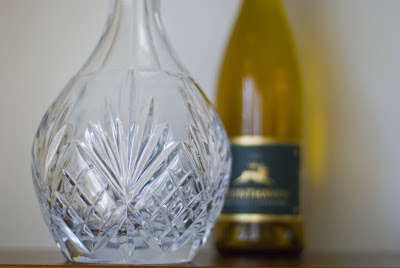
The photo at the very top is Auto-Tone with some minor adjustements from there.
GOOD NEWS OF THE DAY: Thank heavens for digital- my nails wouldn't survive a day in the old darkroom.


2 comments:
Amanda, this is so informative! Thanks! Lisa pointed me to some nestie blogs and I'm enjoying your photo info. I got a Sony Alpha in May and I have yet to figure out what I'm doing. Lightroom sounds like an awesome addition to what I've got.
Thanks for posting this! I've been thinking about checking out Lightroom so this is really helpful. I just ordered CS3 though so I'll have to hold off on it, I think I'll already be in over my head w/ just that!
Post a Comment